


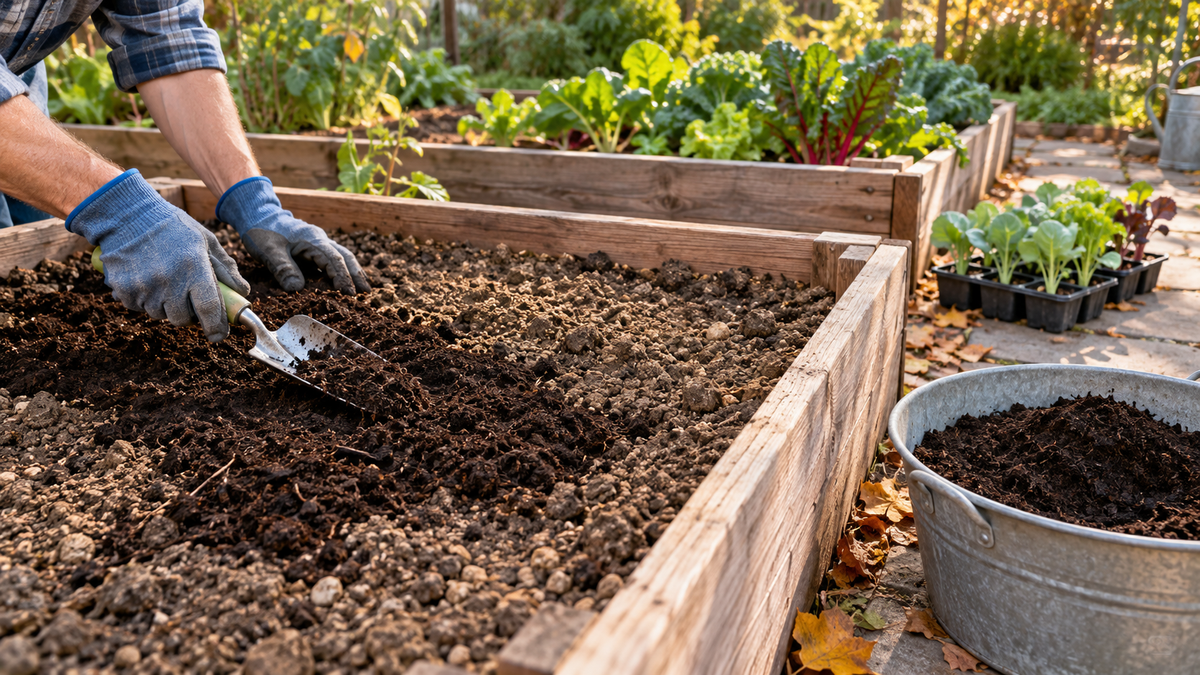
Vegetable Beds · Spring or Fall · Soil Conditions
Add mature compost in spring before planting or in fall after harvest, when your vegetable bed is available and the soil is workable. The best window depends on four things: climate, the gap between crops, soil moisture and what you plan to grow next.
With GEME Terra 2 or GEME Pro, suitable kitchen scraps can enter a continuous indoor microbial process throughout the year. That makes the kitchen routine easier to maintain while you choose the right garden window and prepare the harvested Compost Base for soil use.

Quick Answer: Should You Add Compost in Spring or Fall?
- Choose fall when harvest opens the bed, and you have a workable soil window before winter.
- Choose spring when you can prepare the bed before planting, especially if fall or winter conditions were too wet.
- Choose the gap between crops where vegetables grow through several seasons.
- Wait when the soil is frozen or saturated, the material needs further processing, or soil-test results call for less amendment.
If you applied compost in fall, reassess the bed before adding more in spring. Keep both applications in the same soil-care record.
University of Minnesota Extension includes both spring and fall in its compost guidance for carrots and parsnips. That gives gardeners two useful opportunities; the condition of your particular bed decides which one to use.
Start with the Gardening Hub for the full kitchen-to-soil routine. This guide helps you schedule the compost application within it.
1. When to Add Compost to Vegetable Beds: Four Factors to Check
Choose a window when all four factors line up. An empty bed is helpful, but it still needs suitable soil conditions and a plan for the next crop.
A practical decision aid for vegetable beds. Check compost readiness and soil-test recommendations before either seasonal option.
Scroll sideways to compare all columns.
| Factor | Fall is a useful window when… | Spring or a crop-change window fits when… | Wait or adjust when… |
|---|---|---|---|
| Climate | A workable post-harvest spell lets you prepare a bed before prolonged freezing or difficult winter access. | Fall is very wet, winter runoff is a concern, or the bed is available ahead of the next growing season. | Ground is frozen, severe rain is forecast, or runoff could carry material off the bed. |
| Empty-bed interval | The final harvest leaves space for preparation before a cover crop or a period of winter protection. | Overwintering crops occupy the bed, or harvesting creates a gap before the next vegetable rotation. | Plants still occupy the area. Keep their roots intact and prepare only the cleared section. |
| Soil moisture | The soil is drained and workable after harvest. | The soil has thawed and drained before planting, even if the calendar is later than expected. | Soil smears, sticks heavily to tools, or releases water when handled. Recheck after it drains. |
| Crop schedule | Preparing the cleared bed now leaves less work before an early crop, or you can amend before sowing a fall cover crop. | The next sowing or transplanting is approaching, and mature compost is available for preparation. | The amendment is unfinished, seedlings are already present, or a cover crop needs termination and breakdown time. |
The table combines garden-planning decisions with the RHS guidance on avoiding cultivation in waterlogged or frozen soil. For cover-crop timing, follow University of Maryland Extension’s cover-crop guidance and local advice.
Use a quick field check. Examine soil below the surface, where you plan to work. A bed that feels dry on top can still be wet underneath. If it smears rather than breaking apart, give it more time.
2. Check Compost Readiness and Soil Need First
Use Finished Garden Compost for Pre-Planting Preparation
Ordinary finished garden compost should have progressed beyond recognizable fresh scraps and active heating. An earthy smell and crumbly texture are useful checks, although appearance alone cannot establish every aspect of quality. Keep visibly unfinished material in the composting process.
The RHS composting guide explains common readiness signs and returning uncomposted pieces to another batch. Use GEME’s compost readiness guide for more detail, and the specific Compost Base workflow below for GEME output.
Let the Soil Test Guide Whether to Add More
Review pH, organic matter and nutrient results alongside the history of the bed. A garden that has received repeated compost additions may need a pause. Where excess applications or salt problems are suspected, ask the testing service about soluble salts as well.
University of Minnesota Extension describes problems from excessive compost, including nutrient accumulation and high soluble salts. Keep a simple record of the material, date and amount applied.
Fall can be a useful time to send a soil sample while you plan the next season. The University of Maryland soil-testing guide explains how testing informs amendments before planting. Follow your laboratory’s sampling and interpretation instructions.
3. Adding Compost Before Spring Planting
Spring is a practical choice when the bed is ready for preparation and mature compost is available. It lets you assess the soil after winter and prepare the actual area you intend to plant.
- Check thaw and drainage. Stay on paths until the bed can be worked without smearing or compacting it.
- Review the bed’s record. Include anything added in fall before deciding the spring amount.
- Apply the appropriate material. Use mature garden compost at a locally recommended rate, or follow the separate GEME Compost Base preparation steps.
- Prepare for the next crop. Maintain a suitable seedbed or transplant area and plant when local weather and soil temperature suit that crop.
There is no single “wait two weeks” rule that fits every finished compost and vegetable bed. If the material is still decomposing actively, postpone its use near young roots. If you are also turning in a cover crop, account for that material’s breakdown period separately.
For sowing and transplanting dates, use the vegetable garden planning calendar. For nutrient choices, continue to how to fertilize your garden in spring.
4. Adding Compost After Fall Harvest
Fall is useful when a cleared bed gives you time to prepare before next season’s planting. It can spread the workload and fit soil care into the harvest cleanup routine.
- Confirm the bed is actually vacant. Leave overwintering vegetables and neighboring roots undisturbed.
- Sample and assess the soil. Use recent results and the bed’s amendment history to decide whether compost is needed.
- Use a workable weather window. Prepare the bed while soil conditions allow access; postpone if rain or snowmelt is likely to move material away.
- Plan winter soil cover. Choose an appropriate mulch or a locally suitable cover crop, and leave time for its establishment.
- Record the application. Revisit that record before spring top-ups.
For a no-dig bed, follow its established surface-amendment method with suitable finished compost. For a new bed that needs incorporation, work only when conditions allow it. Deep digging every fall is unnecessary.

Autumn does not make unfinished material ready for planting. A cold winter can slow decomposition. Allow further composting or curing where needed, then assess the material again before spring use.
5. Adapt the Timing to Your Climate and Crops
Use these illustrative situations to apply the four-factor table to your own bed. They are planning examples, not fixed regional schedules.
Cold Winter, Clear Autumn Bed
If the last crop is harvested while the soil remains workable, fall preparation can leave the bed ready for an early planting window. Protect it appropriately, then check its condition again in spring.
Wet Winter, Slow-Draining Soil
If autumn soil is already saturated or runoff is likely, wait for a drained preparation window. A raised bed still needs a moisture check; its frame does not guarantee workable soil.
Mild Winter With Growing Vegetables
Use the gap after a crop finishes. Autumn may be a planting season, so prepare the cleared section for the next crop while keeping the occupied sections intact.
Warm Climate With Several Rotations
Plan amendment decisions between harvest and the next sowing. Choose a weather window that lets you prepare the soil without compaction, excessive drying or loss in heavy rain.
In either hemisphere, follow the local growing season and actual bed conditions. A month name or hardiness zone alone does not tell you whether soil is wet, a bed is vacant, or compost is ready.
6. Prepare GEME Compost Base for Vegetable Beds
GEME Compost Base follows a specific preparation route before plant use. Continuous feeding means harvested material can include pieces that entered the chamber at different times.

Screen and Return
Separate larger unfinished pieces. Return suitable organic pieces to the chamber for further processing.
Mix With Plain Soil
Follow the guide’s approximate ratio: one part screened Compost Base to eight parts plain soil. Mix thoroughly.
Cap and Buffer Roots
Cover the blend with plain soil. Use the guide’s root-buffer approach for new plants; keep applications away from established stems and crowns.
Water and Observe
Apply in a suitable soil window and water as appropriate for the bed. Start cautiously around young plants and observe their response.
Use the full GEME Compost Base application guide for preparation, placement and storage. Keep surplus harvested material breathable and protected from excess moisture while you wait for a suitable garden window.
The blending ratio describes preparation of the material. Choose how much blend the bed receives from its soil condition and amendment history. For direct sowing, maintain a suitable seedbed and keep concentrated material away from emerging roots.
7. Why GEME Helps You Maintain a Year-Round Composting Routine
GEME’s advantage starts with daily kitchen convenience. Terra 2 and Pro let you add suitable scraps to an ongoing microbial process indoors, with automated mixing and permanent odor control. You can keep processing preparation scraps while the vegetable beds wait for a workable season.
That is especially useful during cold or wet periods when repeated trips to an outdoor pile are inconvenient. Kitchen processing can continue close to meal cleanup, and you can schedule soil application around garden conditions. Follow the model’s feeding, harvest and output-care instructions throughout.
Choose processing capacity by household food-scrap input. These figures do not specify garden amendment output or bed coverage.
Scroll sideways to compare all columns.
| Daily kitchen routine | GEME model | Published capacity |
|---|---|---|
| Smaller household and lighter regular loads | GEME Terra 2 | 14 L chamber; up to 2 kg/day |
| Larger family or heavier cooking | GEME Pro | 19 L chamber; up to 5 kg/day |
Measure the suitable scraps your kitchen produces on ordinary and busy days. A small garden does not automatically mean a small kitchen load, and a large garden does not automatically require Pro. Keep leaves, woody prunings and larger garden debris on an appropriate garden-waste route.
8. When to Wait or Change the Plan
Resolve the condition before applying more material.
Scroll sideways to compare all columns.
| What you find | Next action |
|---|---|
| Saturated or frozen soil | Wait for thaw and drainage. Keep traffic and cultivation off the bed. |
| Fresh scraps, active heating or sour-smelling material | Check the processing and storage conditions. Allow further composting or curing; reassess before plant use. |
| High nutrients or soluble salts on the soil test | Pause repeat amendments and ask the testing service or local Extension adviser for a bed-specific plan. |
| Seedlings, overwintering crops or active roots | Prepare a cleared section or wait until harvest. Avoid digging through occupied root zones. |
| Heavy rain or runoff risk | Postpone the application and protect the bed. Keep amendment material out of drains and waterways. |
| More GEME Compost Base than you can use now | Follow the breathable-storage guidance and retain the chamber’s microbial bed during harvesting. |
For conventional finished compost, Oregon State University’s compost-use guide distinguishes new beds from established ones and discusses compost quality and application amounts. Apply those recommendations to the relevant material and site. GEME Compost Base still follows its product-specific soil-blending instructions.
From Daily Scraps to Seasonal Soil Care
Keep Kitchen Composting Going With GEME
Continuous indoor microbial processing, automated mixing and no scheduled odor-filter replacement. Choose Terra 2 or Pro for your kitchen load, then prepare Compost Base for the garden’s next suitable application window.
9. Frequently Asked Questions
Is spring or fall better for adding compost to vegetable beds?
Either can work. Choose fall when harvest leaves an empty bed, and the soil is workable before winter. Choose spring when the bed becomes available then, or wet winter conditions make fall preparation impractical. Use mature compost and let soil condition and crop timing decide.
How long before planting should I add compost?
For mature, finished compost, use the available bed-preparation window before planting. There is no single waiting period that fits every compost and garden. If material is still actively decomposing, keep it out of the seedbed and allow further composting or curing. GEME Compost Base needs its own screening, soil-blending and soil-cap workflow.
Can I add compost after harvesting vegetables in fall?
Yes, if the bed needs the amendment and the soil is workable. Apply before any planned cover crop or next vegetable crop, keep paths and drains clear, and protect exposed soil appropriately. Wait if the ground is frozen, waterlogged or likely to lose material in runoff.
Should I add compost again in spring if I already added it in fall?
Only if the bed still needs it. Record the fall application and assess soil-test results, crop needs, and the material already added. A new season does not automatically justify a second application.
Can I add compost to wet or frozen soil?
Wait until the soil is thawed and sufficiently drained for preparation. Avoid digging, tilling or walking on saturated beds. Postpone application where heavy rain or snowmelt could carry material away.
When should I add compost to a vegetable bed used all year?
Use the gap between crops. Clear the harvested crop, assess the soil and amendment, prepare the bed without damaging neighboring roots, and plan the next planting around local temperature and weather conditions.
How much compost should I add to an established vegetable bed?
Choose the amount using soil-test results, compost quality, bed history and local guidance. An established bed may need only a modest addition, or none if nutrients are already excessive. Conventional finished-compost layer rates do not replace GEME Compost Base blending instructions.
Can I put GEME Compost Base directly into a vegetable planting hole?
Do not place pure GEME Compost Base against roots. Screen harvested material, return suitable unfinished pieces to the chamber, mix about one part screened base with eight parts plain soil, and use a plain-soil cap or root buffer following the GEME application guide. Start cautiously around young plants.
Which GEME model is better for supplying a home vegetable garden?
Choose by the household’s suitable food-scrap load. Terra 2 has a 14 L chamber and processes up to 2 kg/day; Pro has a 19 L chamber and processes up to 5 kg/day. Both provide continuous indoor microbial processing. Their input capacity does not specify how much finished compost a garden will receive.
10. Sources and Related Gardening Guides
- University of Minnesota Extension — Growing Carrots and Parsnips in Home Gardens: spring or fall compost application and soil preparation.
- Royal Horticultural Society — Soil Cultivation: workable soil, wet and frozen conditions, and root disturbance.
- Royal Horticultural Society — Composting: compost readiness and unfinished material.
- University of Maryland Extension — Soil Testing: assessment before amendments.
- University of Maryland Extension — Cover Crops for Gardens: fitting cover crops into vegetable rotations.
- University of Minnesota Extension — Correcting Excessive Compost Applications: nutrient and salt accumulation.
- Oregon State University Extension — How to Use Compost in Gardens and Landscapes: compost quality and site-specific amounts.
- GEME Compost Base Application Guide: screen, return, blend, cap and store with airflow.



Leave a comment
All comments are moderated before being published.
This site is protected by hCaptcha and the hCaptcha Privacy Policy and Terms of Service apply.